Please note that this post, first published over a year ago, may now be out of date.
Here’s how we’ve upped our audio game, and improved our video calls.
The Scale Factory was founded in 2009 as a remote-first organisation. It was a number of years before we took any office space, and so we’ve always been quite familiar with the tools of home working. With the global pandemic going on, this has become the norm for everyone now.
As a result, we’re doing a lot more Zoom meetings, both with our colleagues and with clients. We recently ran an internal discussion on how to improve the quality of these calls, and the general consensus is that although it’s fun to tinker with video tools like OBS, it’s much more important to get the audio right.
Since then, many of the team have spent some of their hardware budget on new audio equipment, and clients have responded very positively to the quality of our calls.
The basics
There are two easy ways to immediately improve your video calls.
First of all, connect your computer to your router using a wired connection. Wifi is great for the majority of day to day computing tasks, but video calls are sensitive to changes in throughput and latency, and the best way to avoid those is to go wired.
Secondly, use a pair of headphones. When you’re on a call without headphones and someone at the other end of the connection is speaking, the volume on your microphone will be temporarily ducked in order to reduce the chance of echo. If you try and speak when other people are talking, parts of your sentences will cut out, making it hard for your listeners to understand. If you wear headphones, that echo cancellation isn’t necessary, and so you can have a more natural bi-directional conversation.
Microphones
Once you’ve solved for the basics, the next place to turn your attention is your microphone.
The main part of a microphone is an element that picks up vibrations in the air, and converts these to an electrical signal. There are a number of different types of microphone element, with some more common than others.
Dynamic microphones work like a speaker in reverse: sound waves move a diaphragm, which in turn vibrates a coil within a magnetic field. This vibration induces an electrical audio signal in the wire.
Condenser microphones use a pair of charged metal plates, one of which can be moved by a diaphragm. Sound waves thus change the capacitance of the two plates, which creates the audio signal. Condenser microphones need a power supply to work, and are a little less rugged than dynamic mics.
Your mobile phone probably has a MEMS (Microelectromechanical System) mic, in which a diaphragm is etched straight onto silicon.
Every microphone element has a number of different properties to consider. We’ll look a the most relevant here.
Frequency Response
Sound waves have a frequency range from 20 Hz (low pitch) to 20,000 Hz (high pitch).
The frequency response of a mic is the range of frequencies at which the mic is the most sensitive. Sound recording engineers will consider the frequency range of the sound source when choosing a mic to match it.
The human voice typically has a fundamental frequency from 85 Hz to 255 Hz, so for voice recording, we want to choose a microphone with good frequency response in that range.

Frequency Response Graph for a Shure SM57 Mic
Directionality
Microphone directionality is the variation in sensitivity of a mic, relative to the angle the sound is coming from. This is sometimes referred to as a “polar pattern” after the graphs used to communicate this information like the ones below. In these graphs, the microphone is considered to be in the middle, pointing towards the 0° marker.
An omnidirectional microphone will pick up sound equally in all directions, which makes them great for picking up audio from a group - but they also pick up a lot of background noise.
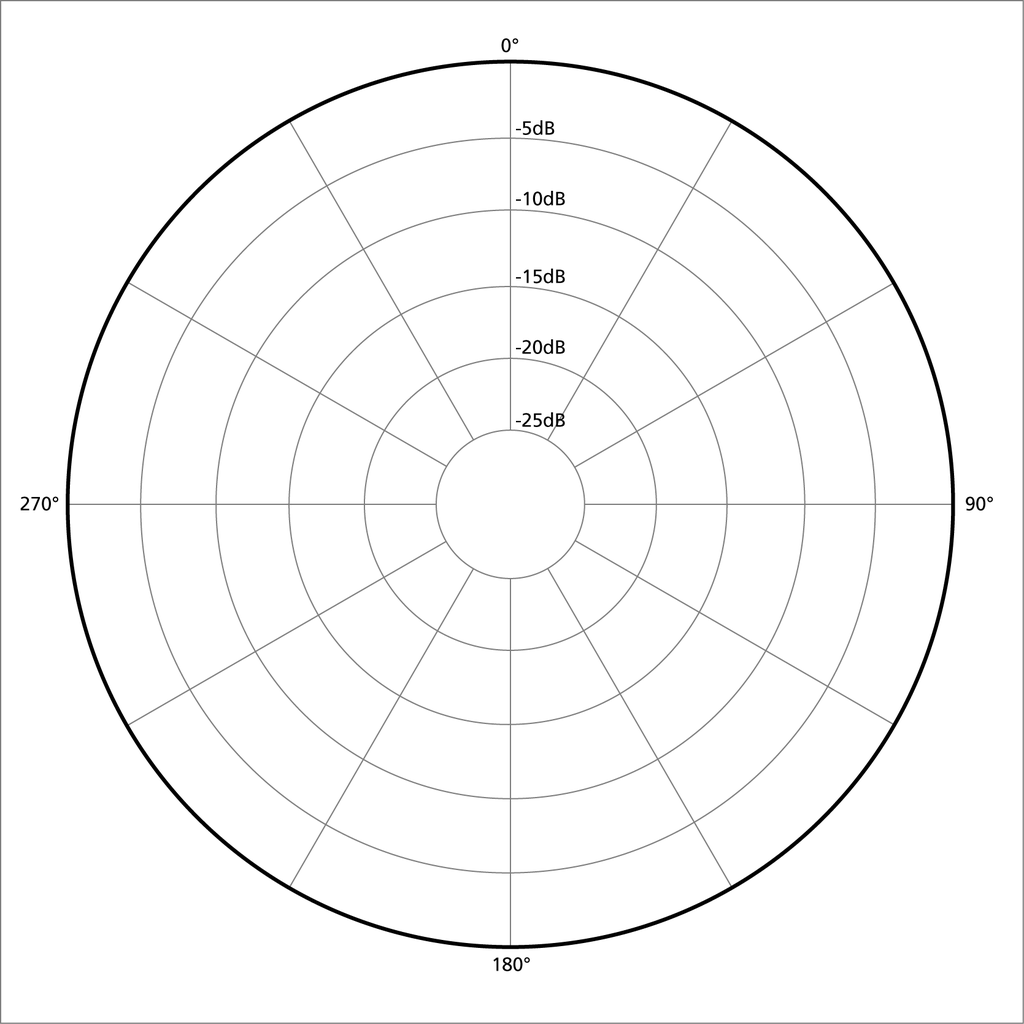
Polar Pattern for an Omnidirectional mic
A cardioid or unidirectional mic picks up sound from the front, but will reject almost all sound from behind, which makes them great for picking up voice without any background interference.
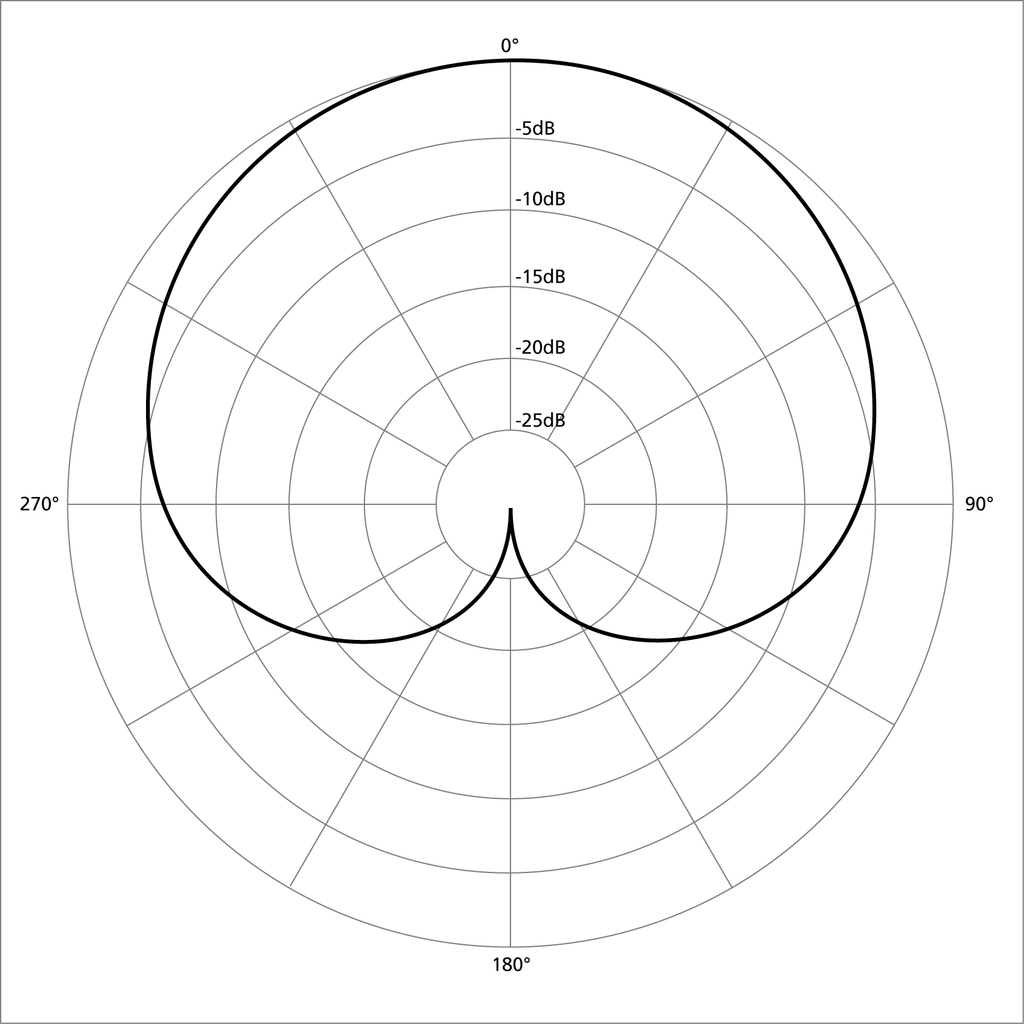
Polar Pattern for a Cardioid mic
Mics can also be bi-directional, hyper-cardioid and super-cardioid, you’re less likely to use these for your video calls.
With an array of two or more microphones and some clever digital signal processing (DSP), you can do something called beam forming in order to isolate a sound source from a specific location relative to the mic. This is good for meeting rooms where different people might be speaking, or a room with general background noise.
Your options
Built-in laptop mics
The mic in your laptop seems like an obvious first choice, but it’s also often a bad one. These are general purpose, omnidirectional, sensitive microphones. They’re designed to try and pick up as much nearby audio as possible. If you’re not in a quiet space, it’ll pick up a lot of background noise.
It’ll also pick up noise from the device itself. If you’re typing during the call, your listeners will hear the percussion of every key stroke, and the scratch of the touchpad, which is quite off-putting. Some of our team have Dell XPS laptops, and those mount the mic close to the CPU fan vent. If your laptop is working hard (as it will be if you’re sharing your screen), the fan noise will be clearly audible by everyone else on the call.
Headphones with built-in mic
Another common option, particularly if you’ve followed my earlier advice and put on a pair of headphones, is to use the mic that’s built into these.
This is a better choice than your laptop’s mic. By design, they’re closer to your mouth and so don’t need to be quite so sensitive, so they’ll pick up less background noise. I use a pair of Sennheiser Momentum 2 Wireless headphones, which uses two microphones and some beam forming DSP to isolate my voice from background noise.
If your headphones are connected by Bluetooth, you’ll be able to walk around the room whilst you’re chatting (I find that doing this, with video off, means I’m less susceptible to “Zoom Fatigue”), but there’s something to be aware of when using Bluetooth.
Bluetooth audio has two modes: one for listening to high quality audio, and one for both listening and speaking through the microphone. The quality of the audio you’ll send and receive will be lower if you’re using the built-mic on your Bluetooth headphones.
Conference mic
In the office, we have a Jabra Speak, which is a microphone and speaker combo that looks a little like a hockey puck and connects either using Bluetooth or USB.
The Jabra is great for picking up multiple voices around a conference table, in a room with little other background noise.
Steve uses a similar device during Well-Architected reviews. It works for him because he has a dedicated office space at the bottom of his garden, so there’s usually not a lot of background noise.
External mic
In terms of audio quality, this is by far the best option. Colleagues who’ve acquired an external mic now have a warm, smooth voice recording on every call.
Unless you plan to use your mic with anything other than your computer, I’d recommend buying something that connects via USB. That way connectivity, and power are both taken care of in one interference-free cable.
No doubt attributable to the rise of streamers, there are plenty of good options in this space.
I chose a Marantz Professional MPM-2000U. It’s a studio-quality condenser microphone, with a cardioid polar pattern. It has to be quite close to my mouth when I speak which took a bit of getting used to, but it picks up very little background noise. I’ve hosted webinars with the dishwasher running nearby, unheard. Adam picked up a Marantz Professional MPM-1000U which is almost identical and a bit cheaper. If you’re buying Marantz be careful to select the USB model (check for the trailing ‘U’ in the model number), otherwise these won’t connect straight to your computer.
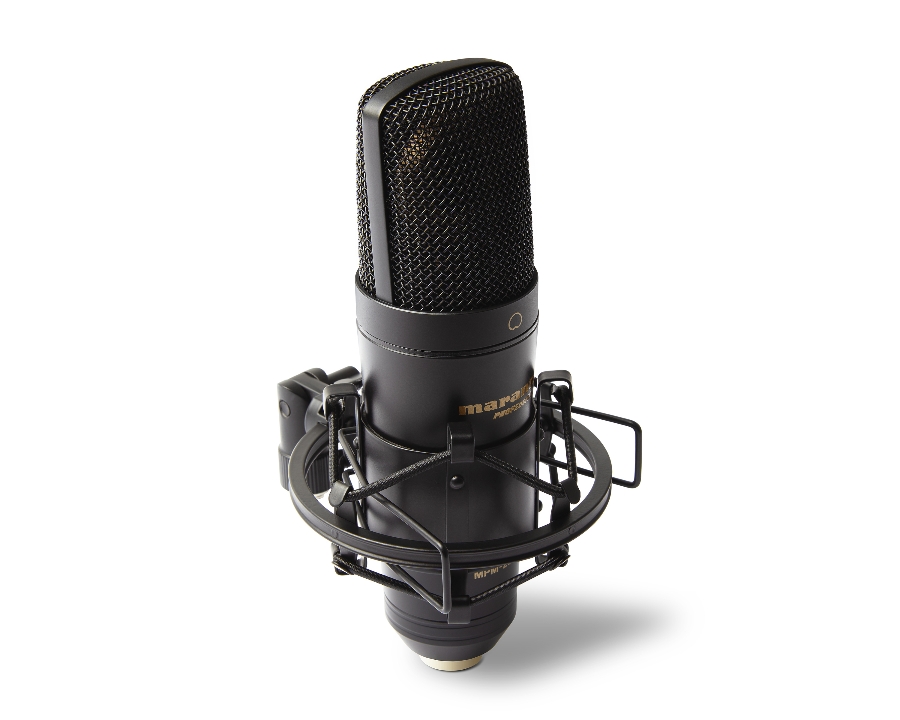
Marantz Professional MPM-2000U Microphone
A popular choice in the team, and favoured by streamers, is the Blue Yeti Nano. This is also a USB-connected condenser mic, but this model contains two elements - one cardioid, one omnidirectional - so that you can choose between capturing one or multiple voices. It also has a mute button, and a headphones connector.
Blue also sell the more expensive Yeti X with a choice of 4 condenser elements, LED metering, and vocal effects; and the cheaper Snowball if you’re on a budget.
Sandro chose a Trust GXT 232 Mantis. Again, this connects via USB and provides an omnidirectional condenser element.
Tim went for a Samson Q2U. Unlike the other options here, the Q2U is a dynamic mic, and has both USB and XLR connectivity options, as well as a headphones connector, making it a good choice if you might have other use cases for a mic. It has a cardioid polar pattern, so you need to keep it pointed in the general direction of your face.
Other considerations
Microphone Stand
As well as the mic itself, you’ll need something to mount it on. The closer you can get the mic to your mouth, the better the recording.
I chose a Trust Gaming Microphone Arm which clamps to my desk and can easily be positioned, or put out of the way when not in use. It has a built-in USB cable so I don’t have to worry about getting tangled in wires.
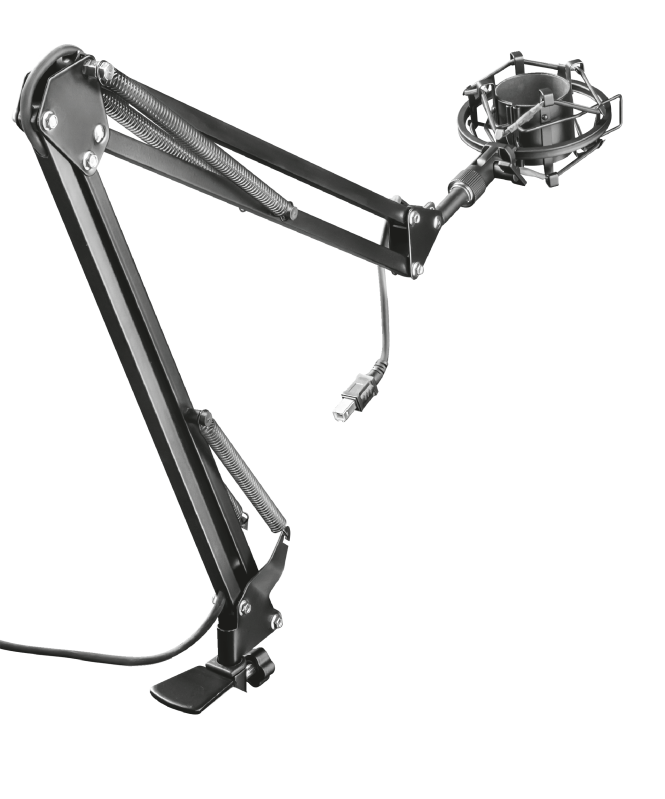
Trust Gaming Microphone Arm
The Mantis and the Q2U both come with a desk mounted tripod stand. The Blue mics all have built-in stands.
Adam picked up an Ammoon desktop tripod stand, which is a good price but isn’t height-adjustable, and has a slight tendency to fall due to the weight distribution when the mic is horizontal.
Shock Mount
A shock mount is an attachment which connects a microphone to its stand using an elastic “cat’s cradle” mechanism, designed to isolate the mic element from sources of mechanically transmitted noise, such as vibrations from your typing.
The Marantz MPM-2000U comes with a shock mount, as does the Trust Gaming Microphone Arm (so now I have a spare), and the Mantis.
Pop Filter
A pop filter (or pop shield) sits between your mouth and microphone and is designed to reduce the popping sounds caused by what phonetics nerds call “aspirated plosives” (such as the ‘p’ sound in ‘pie’). These plosives cause a rush of air to hit the diaphragm of the microphone, generating an unpleasant pop or click sound.
I bought an InnoGear Pop Filter which clamps to my mic stand, and has a flexible gooseneck arm for easy positioning. It looks a little bulky on camera, and I’m mostly talking over the top of the mic during day to day use, so I’ve stopped using it for my zoom calls. It’ll get used again when I’m recording video voiceovers or other audio content where I’m not on screen myself, since in those cases I’ll position the mic as close as possible to my mouth for a better quality recording.
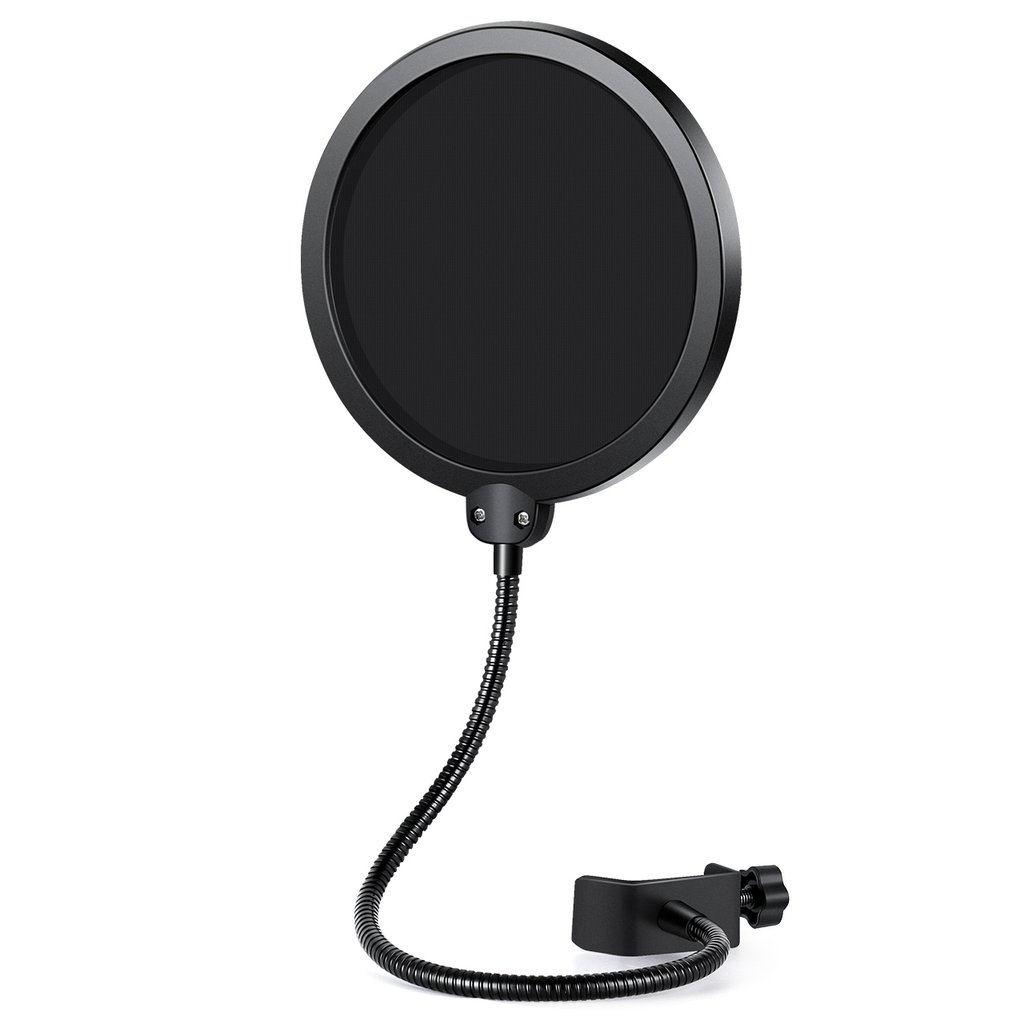
InnoGear Pop Filter
Volume Levels
It’s important to get your volume levels right. Too quiet, and nobody can hear you. Too loud, and the top of your audio waveform “clips”, causing unpleasant audible distortion.
Software like Audacity and OBS Studio display volume level bars for your audio inputs, with a display running from green through to amber (at around -20 to -10 dB) and red (-10 dB to 0 dB).
Ideally, when you’re speaking, you should see the level bar just glance into the red every now and again, during your loudest enunciations. Any more than that, and you should dial the volume back.

OBS Studio Volume Meter
Some software (including Zoom) has the ability to automatically control the volume levels for you, attempting to keep your volume in a comfortable range for your listeners. For the best results, calibrate your own volume levels and turn automatic level control off.
Other Software
Other software exists to make changes to your audio stream, for example to remove noise, or to automatically compress the waveform. Unless you know what you’re doing, this can reduce audio clarity and introduce subtle delays, so you should avoid using this sort of thing. Just send “dry” audio straight to the apps that need it.
Let me hear it!
I recorded a brief video showing the difference between my built-in mic, my bluetooth headphones, and my Marantz USB mic. At the time of recording, there was a desk fan running behind me. The Macbook microphone picks it up slightly, but the other two recordings don’t.
We’ve been an AWS SaaS Services Competency Partner since 2020. If you’re building SaaS on AWS, why not book a free health check to find out what the SaaS SI Partner of the Year can do for you?
This blog is written exclusively by The Scale Factory team. We do not accept external contributions.

